
Maximizing uptime and output quality in block manufacturing requires immediate recognition of equipment instability. Spotting mechanical, hydraulic, and electrical anomalies early prevents severe operational downtime and costly repairs across production lines.
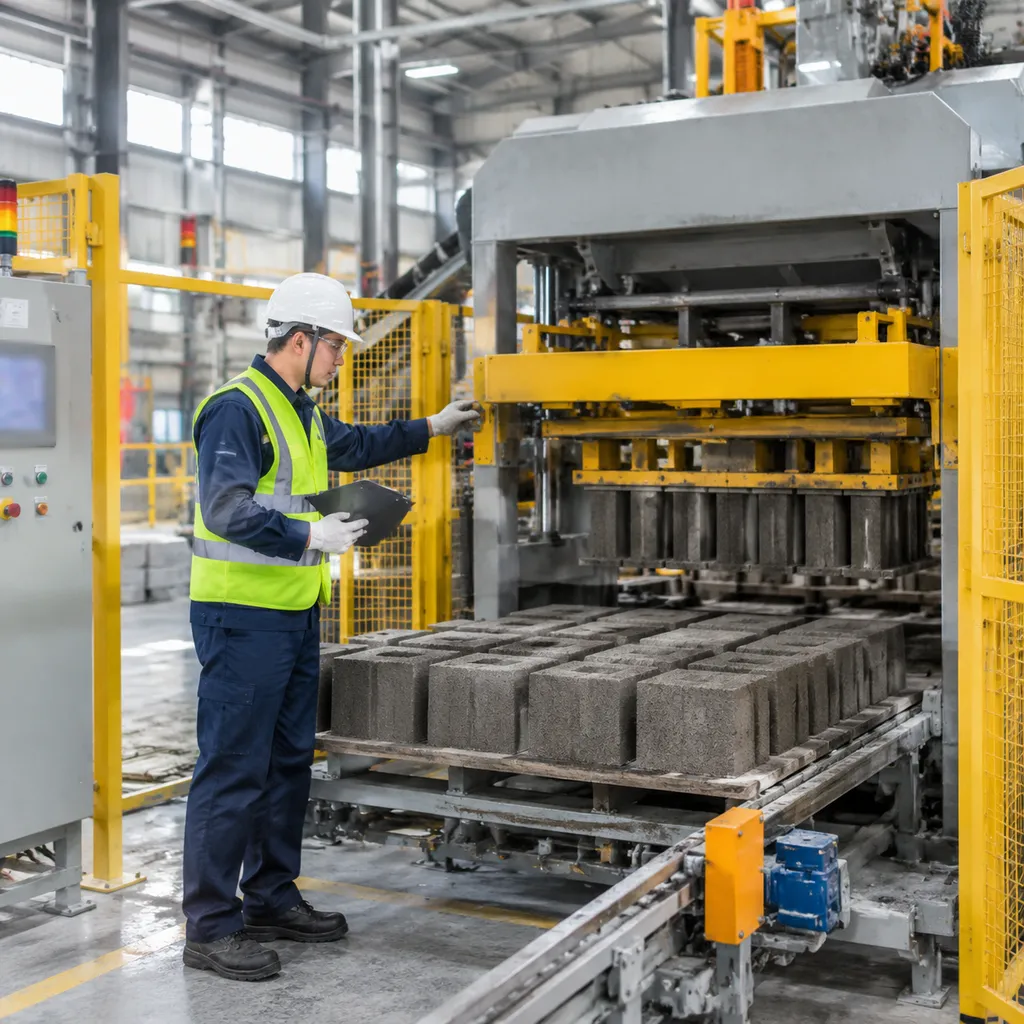
Primary Symptoms of Equipment Malfunction
Equipment failures rarely happen without early warning signs. Monitoring core machinery metrics ensures rapid intervention before major system breakdowns occur:
- Hydraulic Pressure Drops: Gauge fluctuations signal pump wear, internal valve bypass, or fluid leakage.
- Abnormal Noise and Vibration: Excessive rattling indicates worn motor bearings, damaged isolation springs, or unbalanced vibration frequency.
- Sluggish Cycle Times: Slow feeder drawer movement or delayed cylinder extensions point to fluid contamination or valve faults.
- PLC and Sensor Errors: Frequent control panel alerts signal proximity sensor misalignment or electrical voltage fluctuations.
Impact of Operational Errors on Block Quality
Operator errors and uncalibrated equipment directly compromise the structural integrity and appearance of finished units:
- Uneven Block Shape: Improper mold alignment and unequal clamping force create dimensional variations across production batches.
- Low Compressive Strength: Inadequate concrete compaction or an improper water cement ratio leads to internal voids and high block breakage rates.
- Surface Defects: Unbalanced raw material proportioning and improper block curing cause edge chipping, honeycombing, and premature cracking.
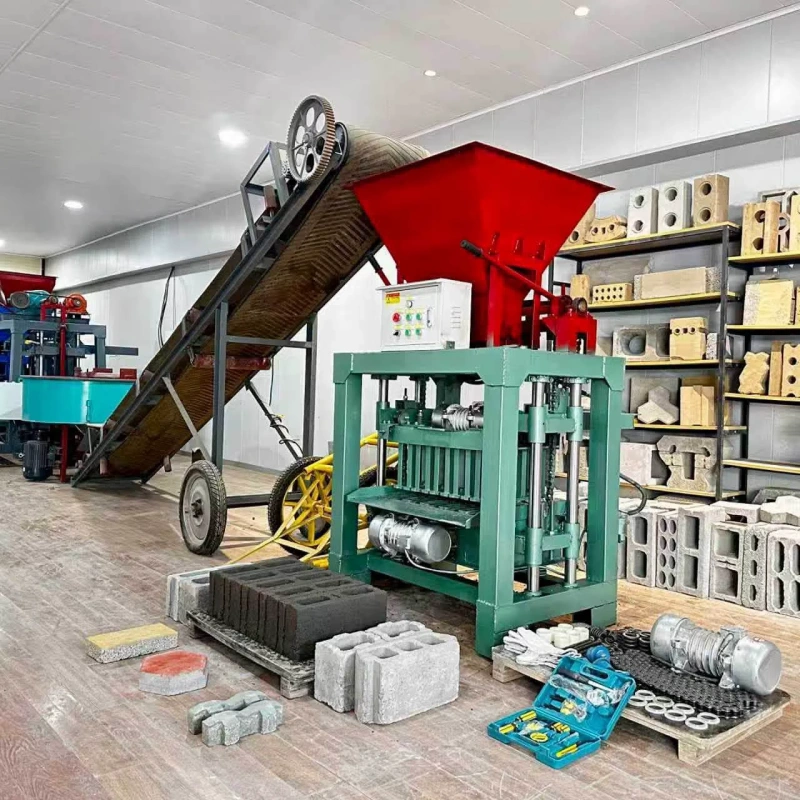
Problem 1: Hydraulic System Leaks and Pressure Drops
Hydraulic fluid is the lifeblood of block production. When hydraulic pressure drops, compaction force degrades immediately, resulting in soft or fractured blocks. Maintaining consistent pressure across all cylinders is essential when running any high-volume concrete block machine.
Causes of Hydraulic Fluid Leaks and Low Pressure
- Degraded Seals and O-Rings: Continuous high-pressure cycles and heat wear down rubber cylinder rod seals, leading to external fluid leaks.
- Particulate Contamination: Fine concrete dust and grit slip into the oil reservoir, scoring internal valve spools and cylinder walls.
- Vibration-Induced Loose Lines: Constant mechanical vibration slowly backs off hydraulic hose couplings and manifold bolts.
- Internal Valve Bypass: Sticking relief valves or worn directional control spools bleed fluid straight back into the tank, killing operating pressure.
How to Repair Seals, Valves, and Hydraulic Pumps
- Replace Damaged Seals: Fully depressurize the system, disconnect the cylinder rod, and replace worn seals with high-temperature polyurethane rings.
- Flush Fluid and Swap Filters: Drain contaminated hydraulic oil, scrub the reservoir tank, replace 10-micron filter elements, and refill with clean oil.
- Check and Torque Hose Connections: Inspect lines for micro-fissures and retighten all loose fittings to standard factory torque ratings.
- Clean Valves and Rebuild Pumps: Disassemble sticky control valves, flush debris with solvent, and replace internal pump vanes or gear assemblies if full pressure cannot be restored.
Problem 2: Excessive Noise and Abnormal Machine Vibration
Unusual noise and erratic shaking are among the most frequent issues in 7 cement block machine problems. While vibration is necessary for dense concrete compaction, harsh metallic screeching or violent frame rattling signals severe mechanical stress that ruins machine accuracy and causes block breakage.
Identifying Mechanical Wear and Loose Fasteners
Constant high-frequency shaking rapidly loosens hardware and wears down moving parts. We always inspect these core areas first when troubleshooting severe noise:
- Frame Anchor Bolts: Tighten loose foundation bolts immediately. A shifting base distorts the machine structure and multiplies operational noise.
- Vibration Shaft Bearings: Listen for screeching or grinding sounds. Damaged bearings overheat quickly and cause uneven force across the mold.
- Structural Weldments: Check high-stress joints for micro-cracks. Structural fatigue absorbs energy meant for compaction, leaving you with weak, crumble-prone blocks.
Proper frame stability is essential for consistent output. Our heavy-duty automatic block making machines utilize reinforced steel frames to minimize frame fatigue, but routine fastener checks remain critical.
Calibrating Vibration Motors and Table Springs
Improperly tuned vibrators destroy block density and throw off the optimal vibration frequency required to settle the aggregate mix evenly.
- Synchronize Eccentric Weights: Set the adjustable counterweights on dual vibration motors to identical angles. Mismatched weights create destructive side-to-side shear forces rather than vertical compaction.
- Replace Table Springs: Inspect rubber dampeners and steel springs under the table. Replace sagging or cracked springs in matching sets to keep the vibration table level.
- Torque Motor Mounts: Torque motor mounting bolts to exact specifications and apply threadlocker to prevent motor phase misalignment during heavy operation.
Problem 3: Mold Misalignment and Concrete Sticking
When running an industrial plant, mold issues rank high among the 7 cement block machine problems that directly damage your bottom line. Wet concrete sticking to mold cavity walls leads to severe block breakage, while poor mold alignment produces an uneven block shape and accelerates machine wear. Operating a high-performance concrete block machine requires precise mold maintenance to ensure every unit meets structural standards.
Inspecting and Cleaning Concrete Block Molds
Concrete sticking strips away sharp corners during demolding, leading to high scrap rates. We prevent buildup and maintain clean ejection using a disciplined daily routine:
- Daily Scraping: Clear out hardened aggregate and cement slurry from mold cavities using pneumatic scrapers or wire brushes after every shift.
- Release Agent Application: Spray a high-quality mold release agent or specialized oil blend evenly across all inner surfaces before starting production runs.
- Cavity Surface Inspection: Check interior mold walls for pitting, deep scratches, or metal fatigue that trap wet mix.
Re-aligning Mold Frames and Pressure Plates
Improper alignment between the tamper head and the mold box creates uneven compaction force and height variations across blocks. Heavy-duty equipment like our QT5-15 automatic cement brick making machine relies on tight mechanical tolerances for consistent production.
- Check Clearance: Maintain a uniform 1.0 mm to 1.5 mm gap between the tamper head shoes and the mold cavity walls on all four sides.
- Inspect Guide Bushings: Replace worn linear guide sleeves, shafts, and rubber damping pads immediately if you detect side-to-side play.
- Level the Pressure Plates: Adjust the hydraulic cylinder stroke limits and stop-bolts so the pressure plate descends completely level, preventing lopsided block density.
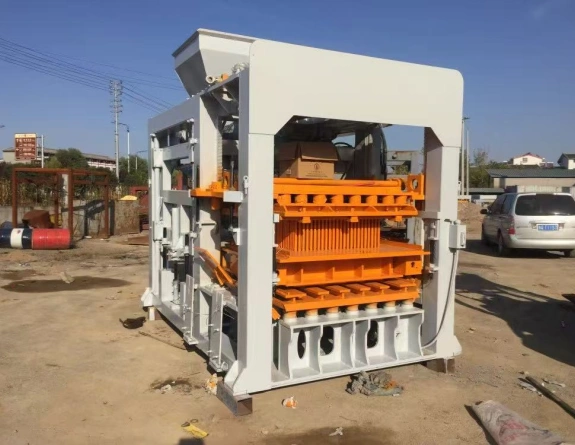
Problem 4: Motor Overheating and Electrical Control Faults
Electrical control faults and motor overheating are among the most critical of the 7 Cement Block Machine Problems. Concrete dust, heavy vibration, and continuous production cycles put severe strain on electrical components, leading to unplanned downtime if left unchecked.
Troubleshooting PLC Controllers and Sensor Errors
Dust accumulation and mechanical vibration frequently disrupt PLC signals and sensor readouts.
- Clean Proximity Sensors: Remove concrete dust and oil film from limit switches and proximity sensors. Dirty sensors fail to detect mold positioning, halting the automated sequence.
- Tighten Control Cabinet Terminals: Daily machine vibration loosens wiring screws in the main electrical cabinet. Inspect and tighten all PLC terminal block connections regularly.
- Inspect Signal Lines: Shield sensor wires from high-voltage motor cables to prevent electromagnetic interference that causes phantom error codes on the main screen.
Preventing Motor Overload and Power Fluctuations
Overheated electric motors indicate underlying mechanical drag or inconsistent electrical supply. Protecting your drive motors keeps your production line running without interruption.
| Failure Cause | Primary Symptom | Direct Fix |
|---|---|---|
| Voltage Spikes / Drops | Frequent breaker trips, motor humming | Install a industrial-grade voltage stabilizer to supply constant power. |
| Mechanical Resistance | High Amp draw, rapid motor heating | Inspect bearings, shaft alignments, and hydraulic pumps for binding. |
| Clogged Air Cooling | Motor body hot to the touch | Blow out motor cooling fins and air intake guards using compressed air. |
If you are setting up or upgrading your production line in an area with unstable grid power, reviewing our how to choose a block making machine guide will help you select machines with built-in thermal overload protection and heavy-duty control systems.
Problem 5: Defective, Weak, or Cracked Concrete Blocks
Producing crumbly, cracked, or soft blocks ruins daily output and profits fast. When units break right off the pallet, the issue almost always stems from improper mix design or incorrect pressing parameters.
Adjusting Water-Cement Ratio and Aggregate Proportioning
Solid blocks rely on precise raw material proportioning. An improper water cement ratio undermines structural integrity before the unit ever leaves the machine.
- Excess Water: Leads to wet slumping, surface air voids, and an uneven block shape after mold ejection.
- Insufficient Water: Prevents proper cement hydration, causing high block breakage rates and rough, crumbling edges.
- Aggregate Grading: Maintain a balanced ratio of fine sand to coarse aggregates to ensure uniform density when running a heavy-duty cement brick making machine.
Optimizing Compaction Force and Vibration Timing
Achieving maximum structural density requires coordinating mechanical hydraulic force with exact vibration timing during the press cycle.
- Pre-Vibration Phase: Run pre-vibration for 1.5 to 2.0 seconds to distribute the raw concrete mix into all mold corners evenly.
- Main Pressure Compaction: Apply full hydraulic pressure while running the main vibration motors to force out trapped air and lock aggregates together.
- Frequency Control: Avoid excessive vibration times, which can cause aggregate segregation and weaken the top surface of your blocks.
Problem 6: Inconsistent Material Feeding and Batching Errors
Inconsistent raw material proportioning directly causes uneven block shape and severe block breakage. When the material feeder fails to deliver exact batch quantities, concrete compaction becomes unpredictable across production runs. On an advanced system like the QT4-15 automatic brick making machine, precise material flow is non-negotiable for consistent density.
Inspecting Hopper Feeder Drawers and Agitators
Mechanical obstruction in the feed box is the leading cause of uneven mold filling. Damp aggregate or sticky mix design residue quickly builds up on internal components, restricting movement.
- Clean the Feed Drawer: Remove hardened concrete build-up from the drawer floor, guide rails, and wear plates daily.
- Inspect Agitator Shafts: Check for bent, worn, or broken agitator pins. Damaged pins fail to break up aggregate bridges, causing air pockets in the mold.
- Check Drive Alignment: Verify that hydraulic cylinders or chain drives push the feeder drawer smoothly and evenly across the entire mold box.
Recalibrating Automatic Weighing Sensors
Load cell errors lead directly to incorrect water-cement ratios and fluctuating batch weights. To restore exact batching accuracy, execute the following steps:
| Calibration Step | Focus Area | Corrective Action |
|---|---|---|
| Zero-Point Tare | Scale hopper clearance | Clear material build-up and reset scale zero point before operation. |
| Load Cell Check | Electrical signals & wiring | Inspect cables for moisture, damage, or loose terminal blocks. |
| Standard Weight Test | Calibration accuracy | Hang certified test weights to calibrate load cell voltage outputs. |
Whether managing fully automated setups or operating a semi-automatic block machine, regularly verifying sensor alignment prevents costly material waste and keeps block dimensions strictly within spec.
Problem 7: Improper Block Curing and Surface Flaws
Even after perfecting compaction force and mix design, poor block curing ruins finished products by causing surface cracks, flaking, and structural weakness. Skimping on this phase directly increases block breakage rates and leaves you with an uneven block shape that fails quality checks.
Regulating Curing Temperature and Humidity Levels
Controlling moisture and heat ensures proper cement hydration, securing full load-bearing strength.
- Humidity threshold: Keep relative humidity at 85% or higher in the curing zone to stop surface moisture from evaporating.
- Temperature control: Maintain ambient curing temperatures between 20°C and 35°C; avoid rapid temperature swings that cause thermal stress.
- Controlled misting: Apply fine fog misting or automated steam curing. Avoid harsh, direct water jets, which erode soft cement paste from fresh block surfaces.
Preventing Rapid Drying and Premature Handling Damage
Direct sunlight, wind exposure, and hasty transport shatter green concrete before it achieves initial set. If you are setting up standard operating procedures or learning how to start a block machine business successfully, mastering early-stage handling is critical for reducing waste.
- Shield green blocks: Cover fresh batches immediately with plastic sheets or moist geotextile covers to lock in moisture.
- Enforce cure timing: Allow fresh units to set undisturbed on pallets for at least 12 to 24 hours before stacking or moving them to the main yard.
- Smooth conveyor operation: Calibrate pallet offbearers and transport carts to eliminate sudden shocks that chip edges and crack soft corners.
Preventive Maintenance Guide for Concrete Block Machines
A disciplined maintenance routine is the best defense against unexpected downtime and structural equipment damage. By catching wear early, I consistently avoid common 7 cement block machine problems and keep production running at peak output.
Daily, Weekly, and Monthly Inspection Checklists
Maintaining machinery requires structured interval checks. Whether running stationary factory equipment or a flexible mobile block making machine, routine checks protect your core investment.
- Daily Checklist
- Clear concrete buildup around molds, tamper heads, and feed drawers to preserve accurate mold alignment.
- Monitor hydraulic pressure gauges to catch fluid leaks or valve drops early.
- Inspect and retighten vibration motor mountings and structural fasteners.
- Weekly Checklist
- Check hydraulic fluid levels, oil filters, and hose connections for wear or deterioration.
- Inspect proximity sensors, limit switches, and PLC wiring terminals for loose connections.
- Examine guide columns and mold frames for binding or uneven wear patterns.
- Monthly Checklist
- Test and recalibrate vibration frequency levels across the compaction table.
- Inspect main structural frame welds for micro-cracks caused by heavy cyclic stress.
- Check aggregate weighing sensors and batching scales to maintain accurate mix proportions.
Lubrication Protocols and Long-Term Machine Care
Proper lubrication protects moving parts from abrasive concrete dust and high vibration loads. Establishing rigid grease schedules maximizes performance across every concrete block machine application.
- Vibration Bearings: Apply high-temperature, extreme-pressure grease to vibration table bearings daily.
- Guide Columns & Bushings: Wipe down and oil guide shafts twice per shift to maintain smooth vertical travel during concrete compaction.
- Hydraulic System Maintenance: Replace return line filters every 500 operating hours, and perform a complete fluid flush every 1,500 hours.
- Long-Term Storage: Thoroughly wash down the machine, coat all raw steel mold surfaces with rust inhibitor, and relieve system pressure to prevent premature wear and block breakage during future restarts.